Recently, I bought a 1997 F250 with the 7.3L Diesel. A really solid truck! But on the first trip to the gas pump I discovered that both fuel tanks had to be filled very slowly or they would back up and overflow... It took 20 minutes to fill both tanks!!
Looking for a fix online, I found that many people had run into this problem. There's lots of solutions too, including adding vent lines to the tank or even installing custom aftermarket tanks.
I really didn't want to modify or remove the tanks if I could avoid it. Looking more closely at how the stock tank worked, I learned that there's actually two vents: One on the top of the tank that vents through a small hose to air, and another that vents through the filler tube to the gas cap. The one on top slowly vents through a check valve as the engine pumps fuel out of the tank. The check valve prevents spillage in case the truck rolls over. This smaller vent doesn't affect filling at the pump. The larger vent at the filler tube is the one that's supposed to vent at a high flow rate during filling.
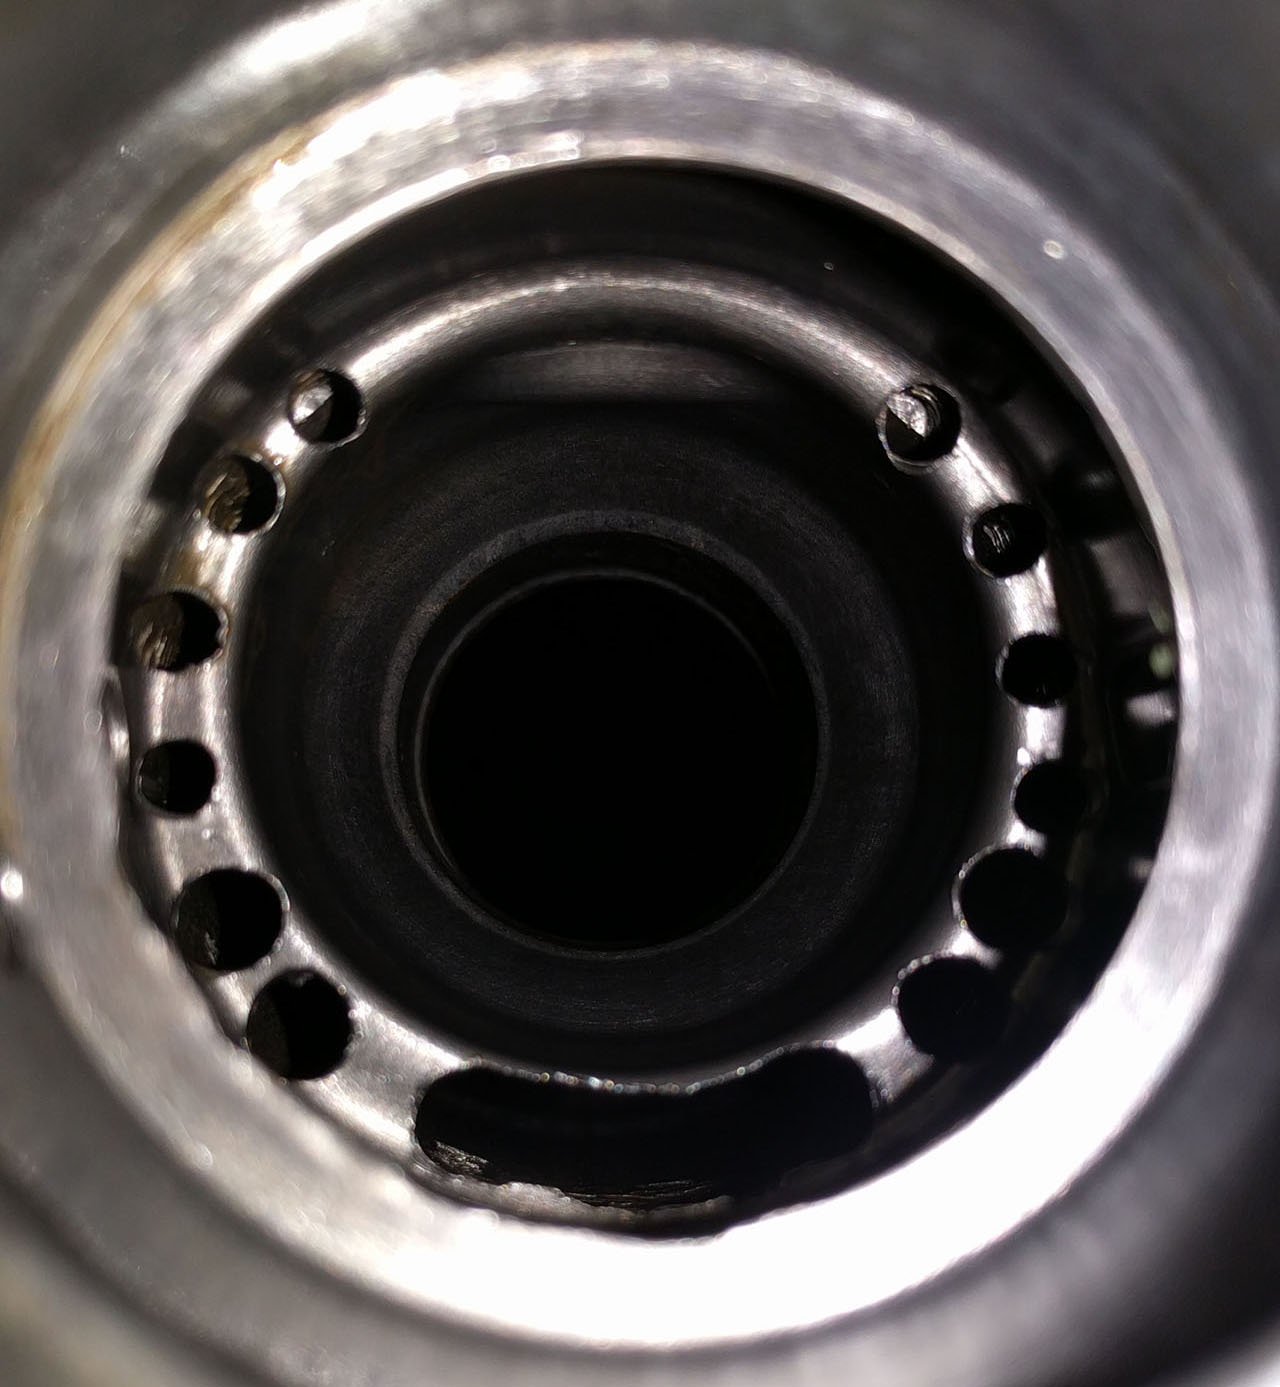
The filler tube itself is actually one hose inside another. The inner hose delivers fuel from the filler port to the fuel tank, and the outer hose vents air from the tank so that it can fill properly. There's a small hole at the filler port that allows the outer hose to vent to the outside. On my '97 F250, the filler port vent is the small C-shaped hole in the photo below.
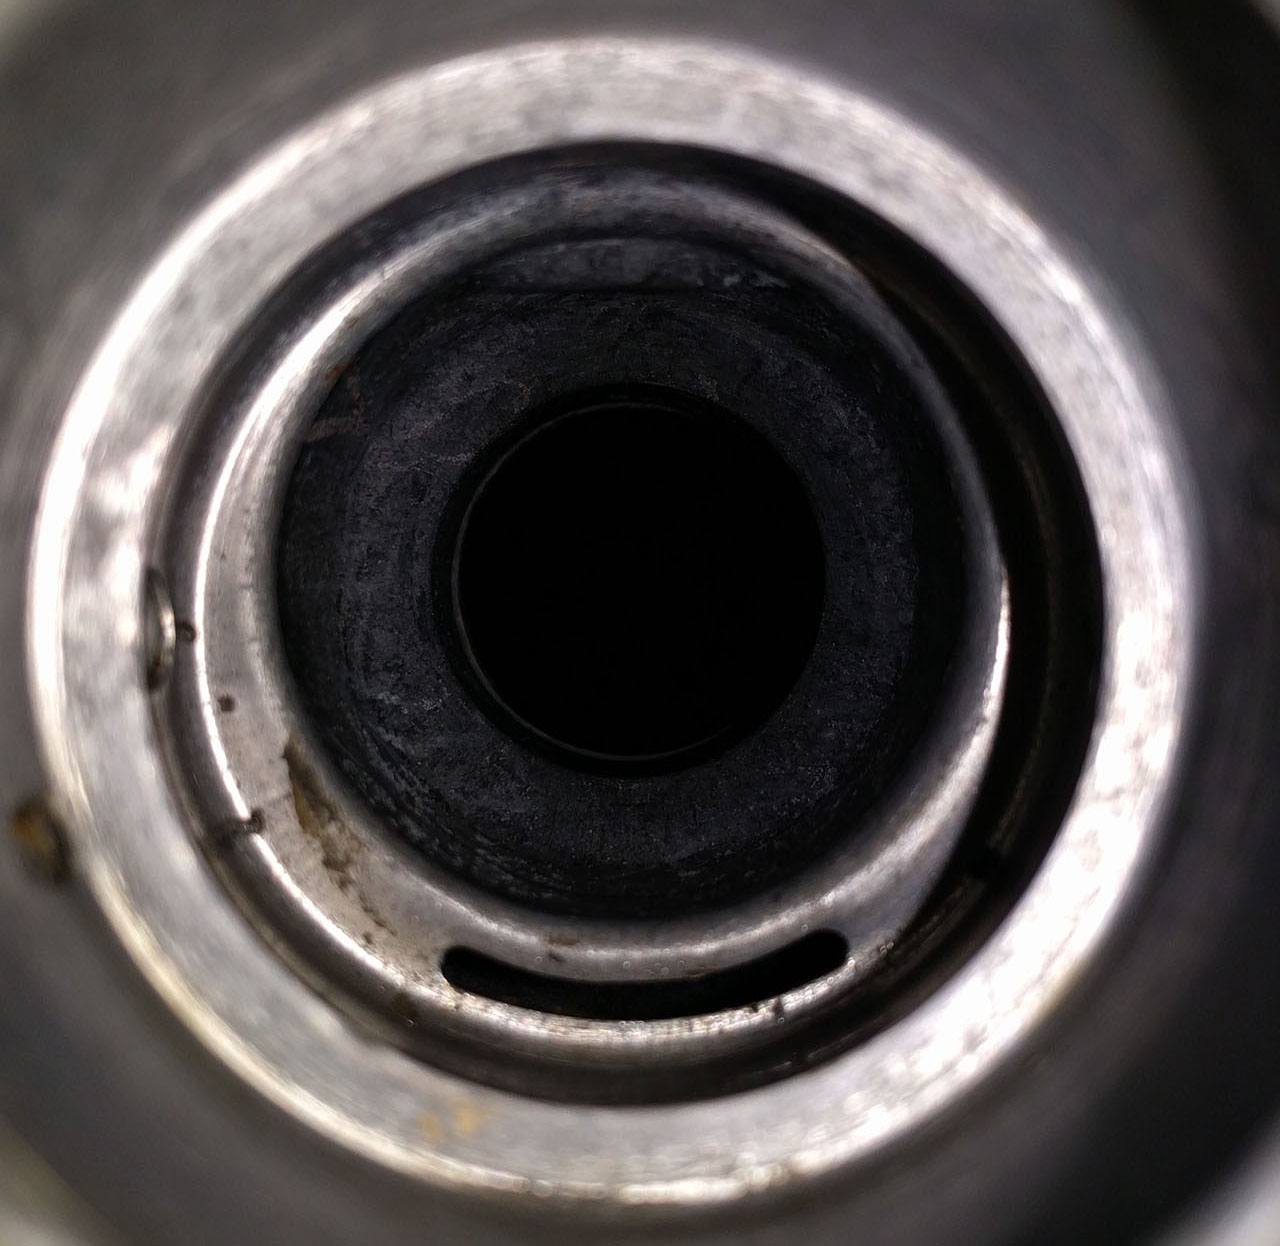
A few tests determined that this vent hole is far too small for high fill rates. Even just a little back pressure on the vent would cause the diesel to foam, and back up in the filler tube. So I tried increasing the size of the existing c-shaped vent hole and adding some extra vent holes as well, using 3/16" and 1/8" drill bits:
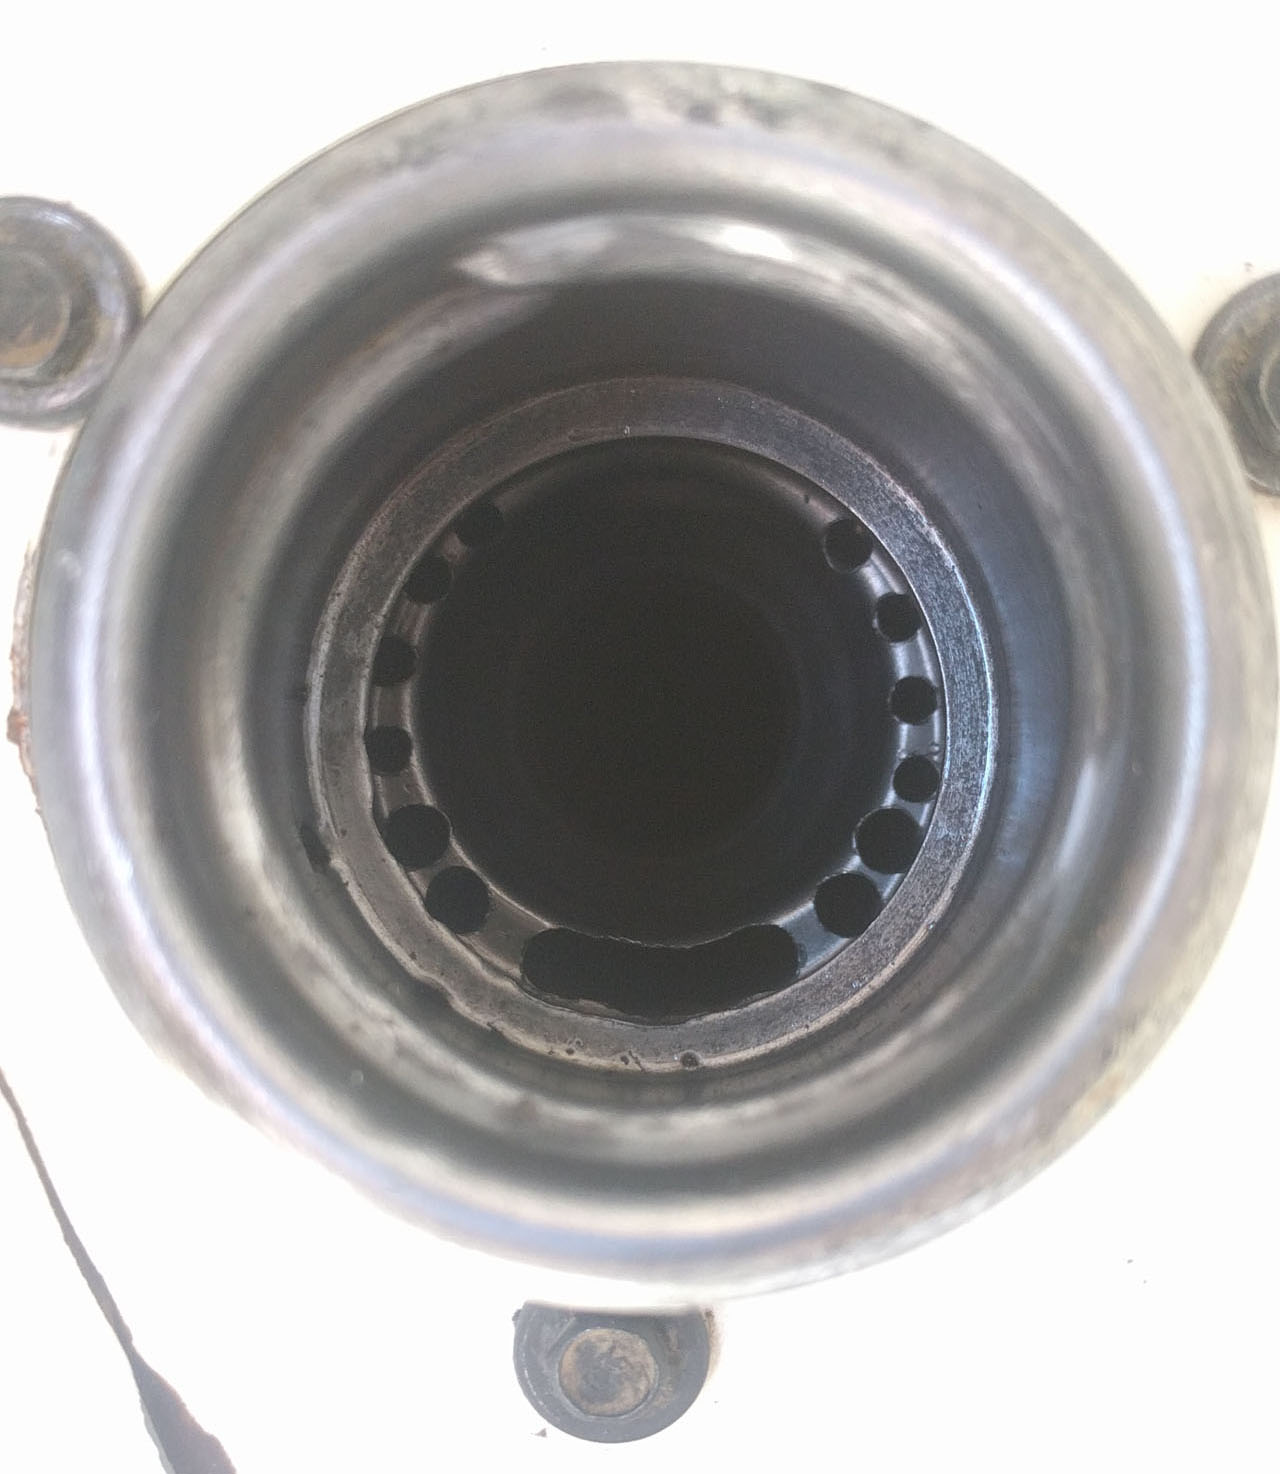
The results were dramatic! After adding the extra vent holes shown above, the tank could take the highest rate that the station pump will deliver, about 10 gallons per minute. Also, the filler port now produces a very satisfying 'whoosh' sound as the tank fills at full rate.
This modification shouldn't affect engine operation or smog regulations, since the new vent holes are behind the gas cap just like the original vent hole, and therefore closed off when the cap is screwed closed.
Here's what I did to add the extra vent holes to the filler port:
1) Run the fuel level in the tank down to near empty, so that fuel won't spill out when the filler tube is removed.
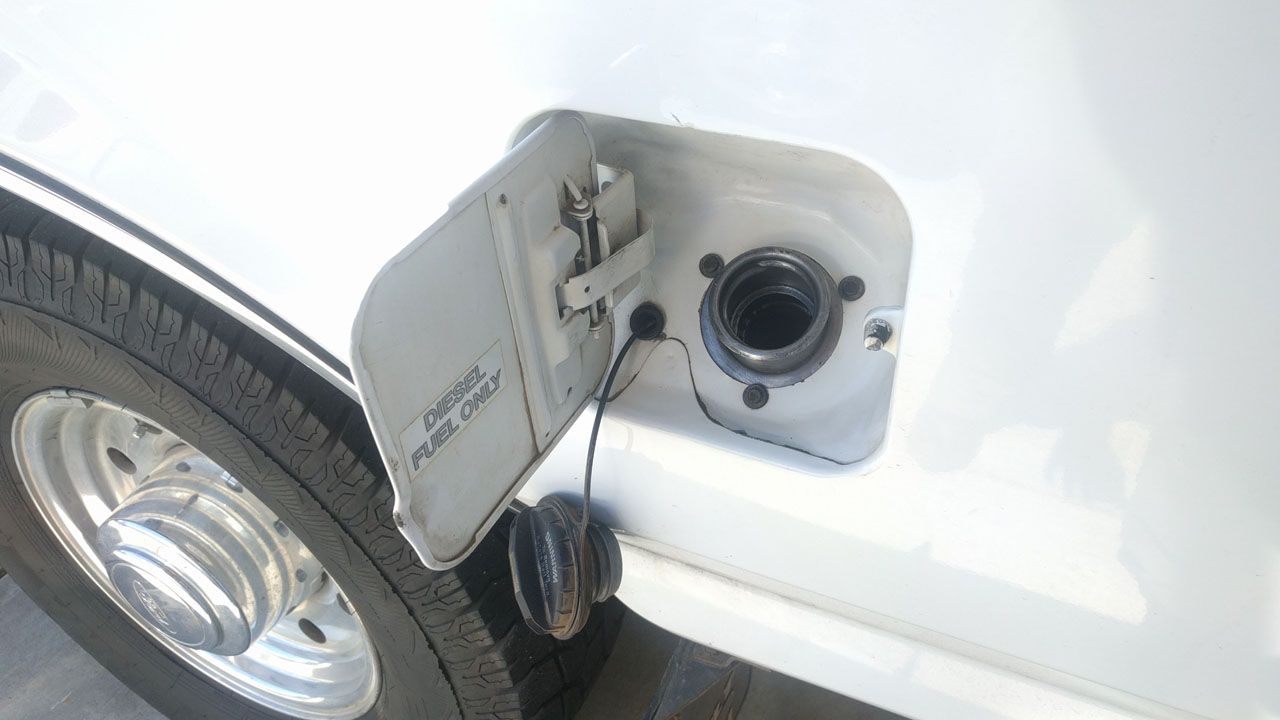
2) Remove the three 7mm screws mounting the filler port to the body. Here's what they look like on my 97 F250:
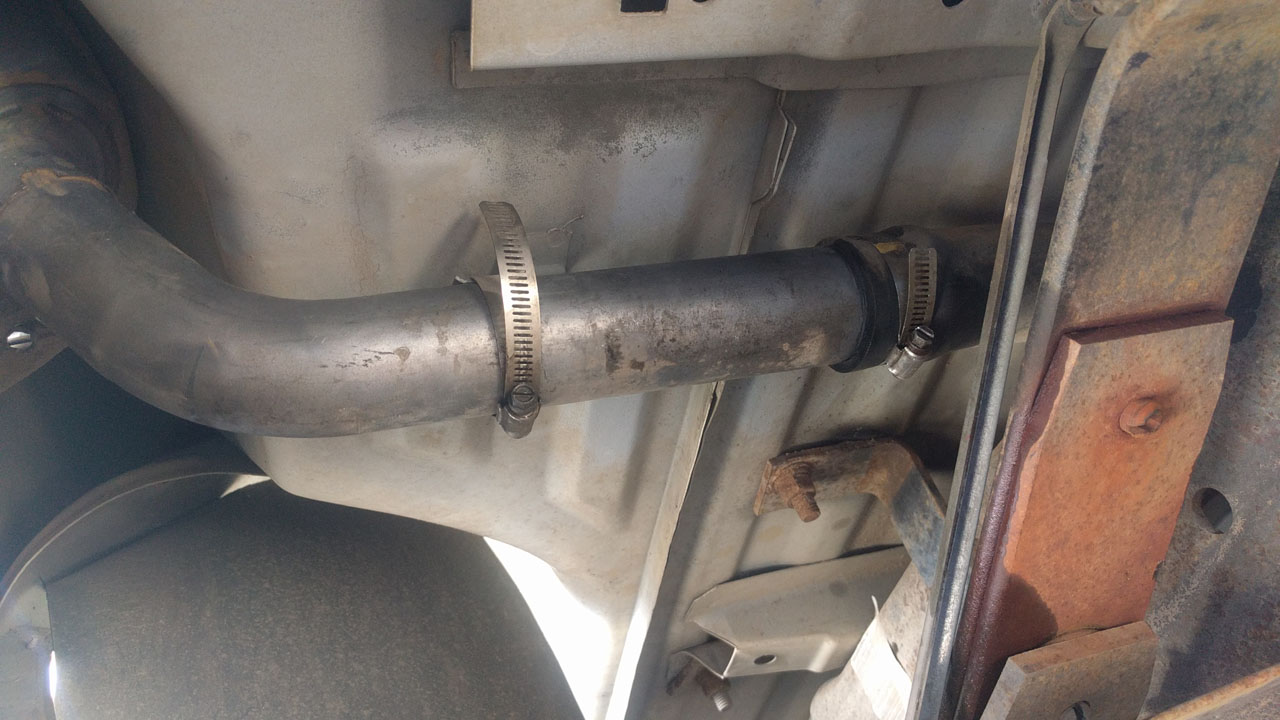
3) From underneath, loosen the two hose clamps around the filler tube. One mounts the tube to the bed and the other seals the metal filler tube to the rubber filler tube from the tank, as shown below:
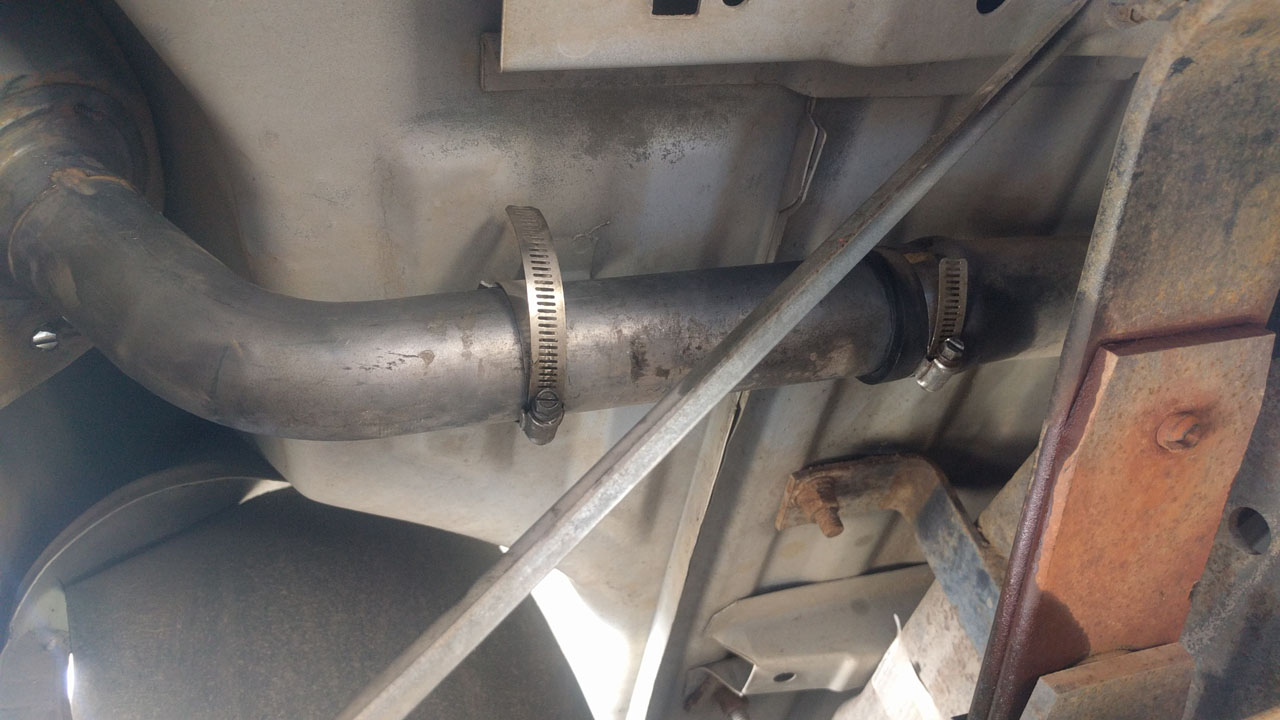
There's a fender strut in the way of the rear filler tube. Remove one bolt and swing it out of the way for easier access.
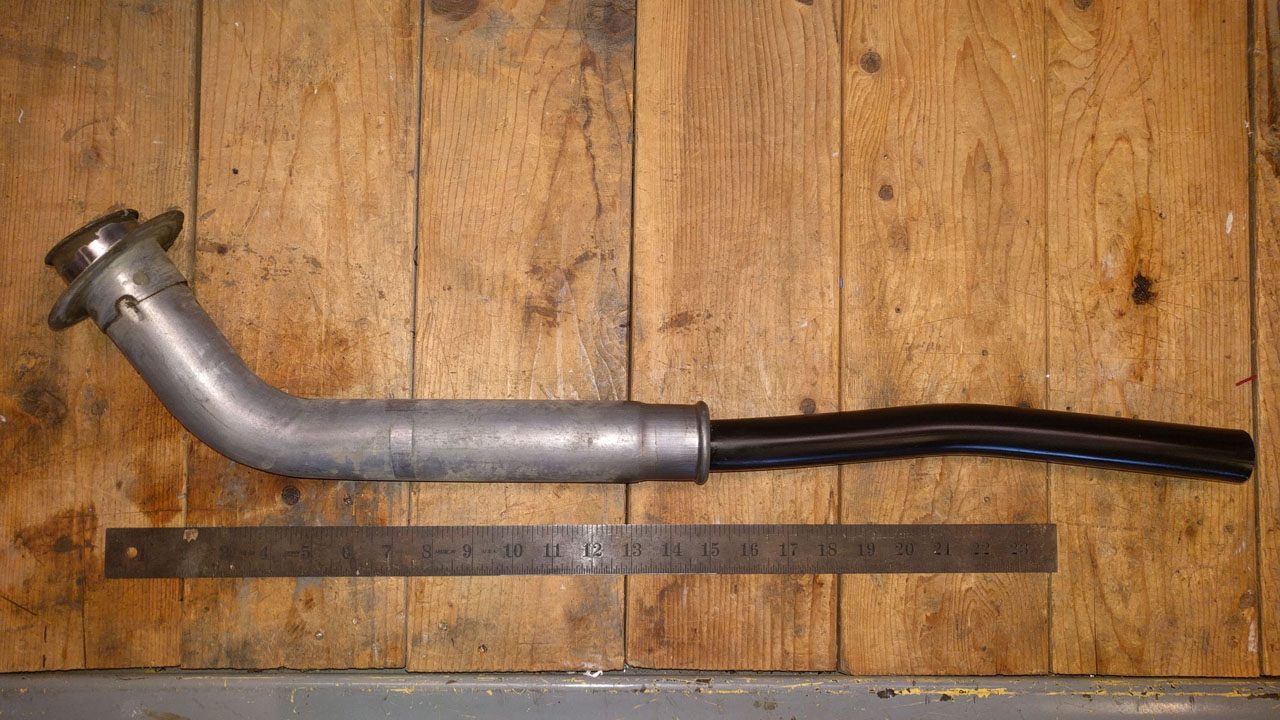
4) Pull the metal filler tube out of the rubber tube from the tank. A rather long inner hose will come out with the filler tube assembly. Here's what the rear filler tube assembly looks like, below. The front tube is similar, but with a longer inner hose that has a stronger kink in the end:
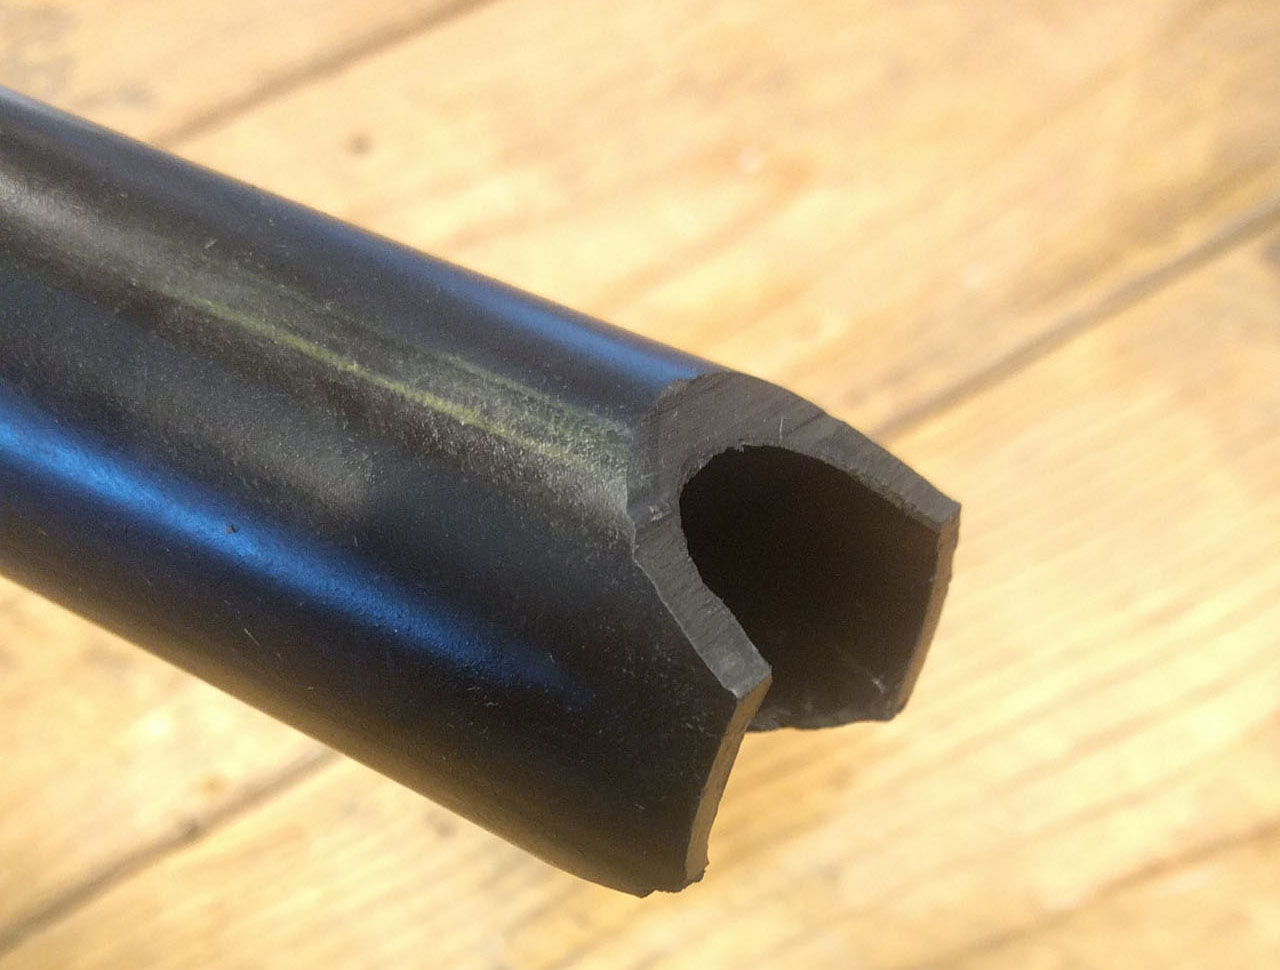
5) Clamp the filler tube in a vise, near the filler port end. Be careful not to clamp so hard as to damage the outer wall of the tube. Using your best freehand metal skills, carefully locate and drill a set of holes like the ones shown below. I opened the c-shaped hole with a drill bit as well. I used a 3/16" and a 1/8" drill bit for these holes. Also take care to not drill through the outer wall; drill only into the vent area between the inner and outer pipes.
6) Once finished drilling, de-bur the hole edges and thoroughly flush out all of the shavings. A parts washing tank would be good, but I just used solvent and a compressed air nozzle.
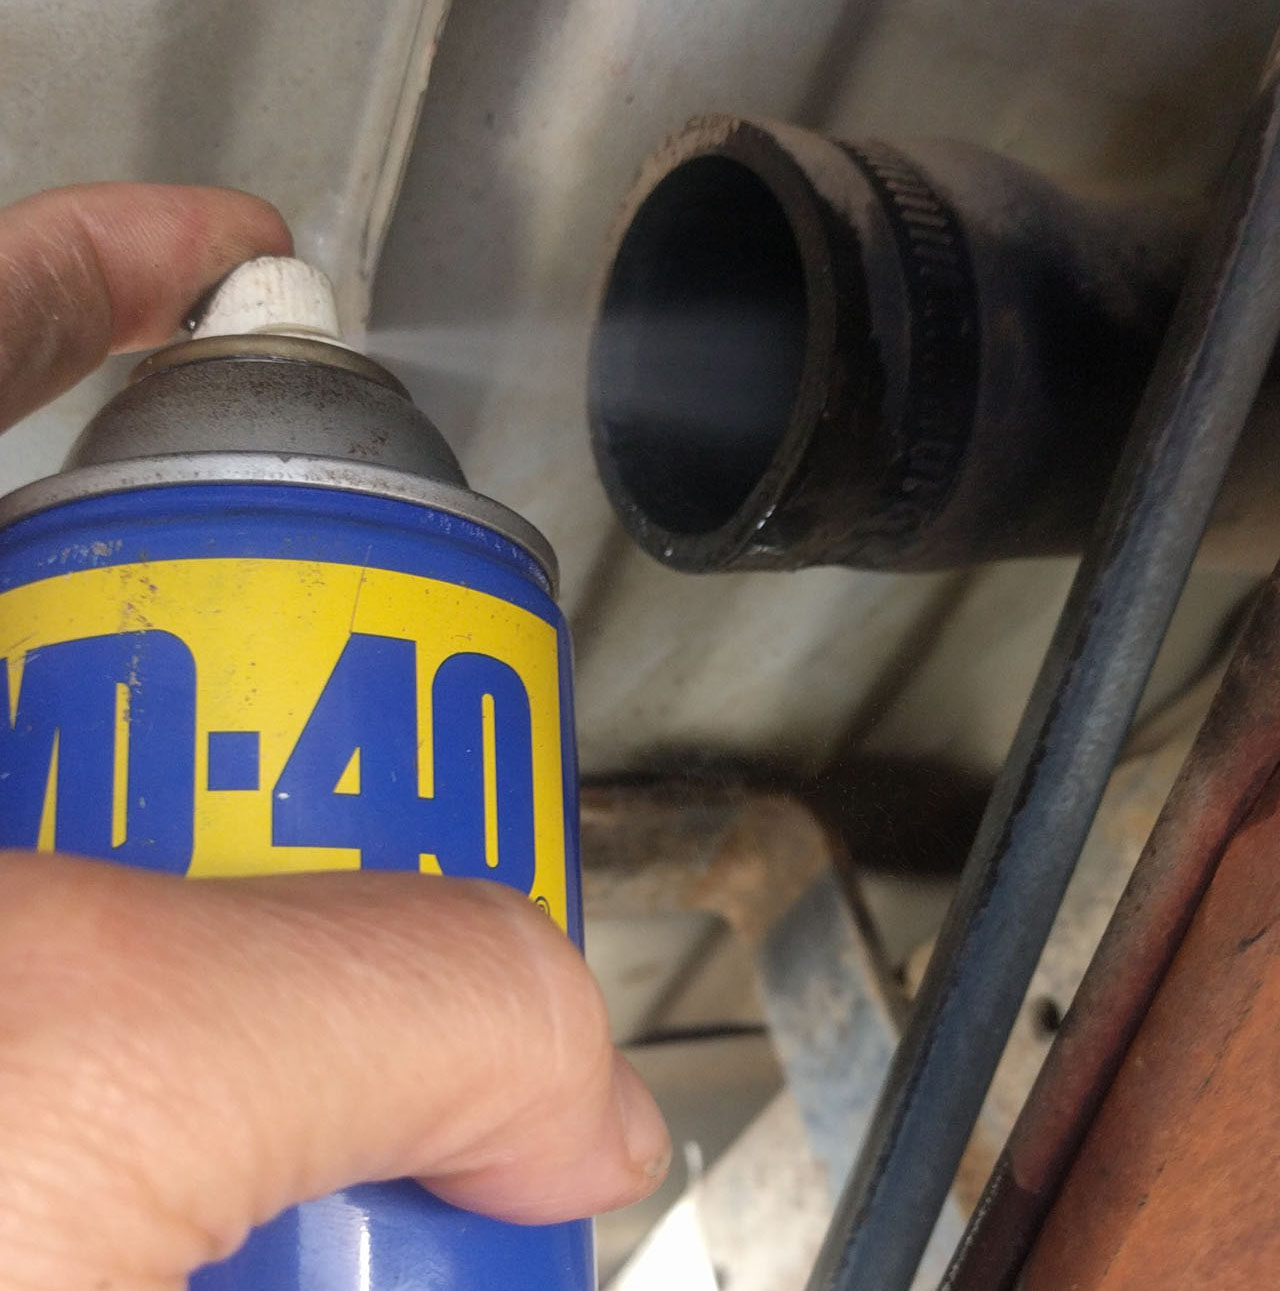
7) Re-install the filler tube. Threading the inner hose all the way back into the tank can be challenging. I found two things that helped -- spray some WD-40 into the tank hose, and chamfer the ends of the inner hose so that it gets past obstacles better. Be sure to de-bur the chamfer cuts as well:
8) Drive to a gas station and test it out! The sound of the tank venting during filling should be much more pronounced. Also check underneath during filling for any leaks.
© Lightning On Demand 2024